
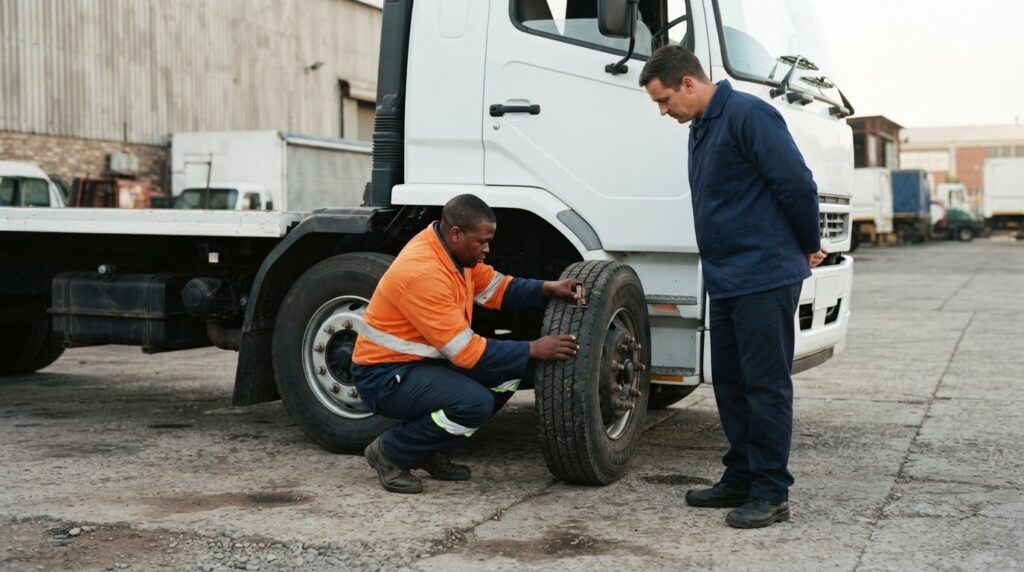
A pre-journey inspection is a driver responsibility, not a box-ticking exercise. Knowing how to conduct a vehicle pre-trip inspection means checking key components before each journey, including tyres, brakes, lights, steering, fluids and cargo securement. A thorough inspection typically takes 15-20 minutes, depending on the vehicle and its cargo configuration.
A consistent walk-around can help identify faults before they contribute to a breakdown or accident, while recording and reporting issues gives fleet management a clear basis for follow-up. This guide explains how to inspect exterior components, test brakes, steering and suspension, check the cab and controls, and document concerns, so you can apply a repeatable process to the vehicles you operate.
Key Takeaways
- Use a consistent route around the vehicle so exterior checks are systematic and key components are less likely to be overlooked.
- Assess brake response, steering behaviour and suspension condition, and treat unusual operation as a reason to pause and investigate.
- Record inspection findings clearly so fleet management can act on defects and maintain a reliable vehicle history.
- Adapt the checks to the vehicle and its load, including cab controls, essential fluids and cargo security.
- Build driver capability through structured training that supports safer driving practices and compliance responsibilities.
Exterior checks: tyres, wheels, lights, mirrors and windscreen
Yes. Use the steps below as a checklist for a South African car, van or commercial vehicle. Record each result and report defects through your organisation’s inspection process.
- Start at the front and inspect the windscreen. Look across the glass for cracks, chips, dirt or anything obstructing the driver’s view. Check that the wiper blades sit securely and show no visible damage. Confirm washer fluid is available, then test the washers and wipers from the cab. Clear visibility matters in changing weather and road conditions.
- Check the front tyres and wheels. Look for cuts, bulges, embedded objects, uneven wear or a visibly deflated tyre. Examine each wheel for cracks, damage or loose-looking fasteners. Repeat the checks on the rear tyres, including inner tyres on a vehicle with dual wheels. Compare the tyres across each axle and note differences that need attention.
- Walk along each side of the vehicle. Inspect mirrors for secure mounting, cracks and clear reflective surfaces. Check indicators and reflectors for damage, dirt or missing parts. Test indicator operation with the ignition on, using a colleague to confirm the lights work if necessary. Check that side panels, doors and external fittings appear secure.
- Inspect the rear lighting and bodywork. Confirm that rear indicators, brake lights, reflectors and other fitted lights are present, clean and undamaged. Ask someone to observe the brake lights while you apply the pedal. Look for loose panels, hanging components or fresh damage that could affect safe operation. Record defects rather than relying on memory.
- Look beneath the vehicle for leaks. Check the ground for fresh pools or drips, then look for wet patches around visible hoses, the radiator and fluid reservoirs. In the engine compartment, inspect the battery for visible damage and check engine oil, coolant and windscreen washer fluid according to the vehicle’s markings and handbook. Never open a hot pressurised cooling system.
- Check the vehicle’s safety equipment. Confirm that assigned items, such as a warning triangle or first-aid kit, are present, accessible and in usable condition. Keep equipment secured in its designated place, rather than buried beneath cargo. Record missing or damaged items for the responsible person to address before departure.
- Finish with a complete walk-around. Check that number plates are visible, the fuel cap is secure and no object is left near the tyres. Note defects on the inspection record and report them before the journey. A thorough pre-trip inspection typically takes 15-20 minutes, depending on vehicle type and cargo configuration.
Testing brakes, steering and suspension
- Set up a controlled test. Park on level ground, apply the parking brake and check that the vehicle is secure. Start the engine and observe the dashboard for brake or steering warnings. If a warning remains illuminated, record it and follow the organisation’s defect procedure before moving the vehicle.
- Check the brake pedal while stationary. Press the pedal and note whether it feels firm and returns normally. A pedal that sinks, feels unusually soft or travels further than expected needs attention. Check that the parking brake engages and releases as intended, without forcing the mechanism.
- Assess braking response cautiously. In a clear, controlled area, move slowly and apply the brakes smoothly. Notice whether the vehicle pulls to one side, vibrates, makes unusual noises or takes longer than expected to stop. Stop the test if control feels uncertain, then report the symptom rather than attempting a repair.
- Inspect visible brake components where accessible. Look behind the wheels for obvious damage, fluid traces or loose components. On a vehicle with air brakes, observe the relevant gauges and warning indicators during the normal start-up process. Compare readings with the vehicle’s operating instructions, and report abnormal indications.
- Test steering response at low speed. With the vehicle stationary, turn the steering wheel gently through its normal range. Note excessive free movement, stiffness, unusual noises or a wheel that does not return smoothly. During controlled movement, check whether the vehicle responds predictably without drifting or pulling.
- Look for suspension concerns. Compare the vehicle’s stance from side to side and front to rear. Check for sagging, visibly damaged springs, loose components or fluid around accessible shock absorbers. During a cautious drive, note excessive bouncing, knocking or instability over ordinary road surfaces. Record observations without diagnosing the cause.
- Verify the cab controls. Test the horn, turn signals, hazard flashers and windscreen wipers from the driver’s seat. Confirm that temperature controls respond and mirrors provide a usable view. Listen for abnormal sounds when starting the vehicle, since difficulty starting or unfamiliar noises can indicate a developing issue.
- Document and escalate defects. Describe what happened, when it occurred and which control or system was involved. “Brake pedal feels soft” is more useful than “brakes faulty”, because it records an observable symptom without assuming a diagnosis. Organisations formalising these procedures can support consistent practice through structured driver safety guidance.
Commercial driver inspection responsibilities
For South African commercial drivers, inspect the vehicle before each journey, document any issues and report them to fleet management. This is a practical operating routine, not a substitute for separate roadworthiness requirements that apply to the vehicle.
- Take responsibility for the inspection. The driver conducts the pre-journey check because they are preparing to operate the vehicle. Follow the organisation’s inspection procedure and use the correct record for that vehicle. A fleet process can assign follow-up tasks, but it should not leave uncertainty about who reports a defect.
- Complete the check before every journey. Treat each departure as a fresh inspection, even if the vehicle was used earlier. A tyre, light or control can develop a fault between trips. Check again after a vehicle change, a load change or a reported incident, so the inspection reflects the actual journey.
- Record findings as observable facts. Note the affected component, what you saw or experienced, and when you noticed it. For example, write “left indicator does not illuminate” rather than “electrical fault”. Clear descriptions help fleet management assess the issue without mistaking a driver’s observation for a technical diagnosis.
- Report minor defects as well as serious ones. A cracked mirror housing, loose fitting or intermittent warning light can become more consequential if left unrecorded. Send the report through the organisation’s established channel, and identify whether the defect affects visibility, control, braking or another safety-critical function.
- Escalate concerns before proceeding. If a defect affects safe operation, stop the departure process and notify the responsible fleet contact. Do not assume that a previous driver reported the same symptom. Record the decision and the response received, following the organisation’s defect-management procedure.
- Keep the inspection record traceable. Use the correct vehicle identification and enter the inspection date, driver details and findings requested by the form. If the record is digital, submit it through the approved system. If it is paper-based, make entries legible and store them through the established process.
- Separate observation from repair decisions. Drivers identify and report what they can see or experience; maintenance personnel assess technical faults and repair needs. For example, report a pulling sensation under braking without diagnosing its cause. This distinction supports accurate records and appropriate follow-up.
- Close the loop on reported issues. Before the next departure, review the status of previously reported defects through the fleet process. Confirm that the required action has been recorded, and repeat the relevant check. A recurring warning or noise should be reported again, even if it appeared on an earlier record.
- Apply the same standard across vehicle types. A car, van or lorry may require different checks, but responsibility remains clear: inspect, record and report. Driver training can help organisations establish consistent procedures, especially where different drivers share vehicles or work across changing routes.
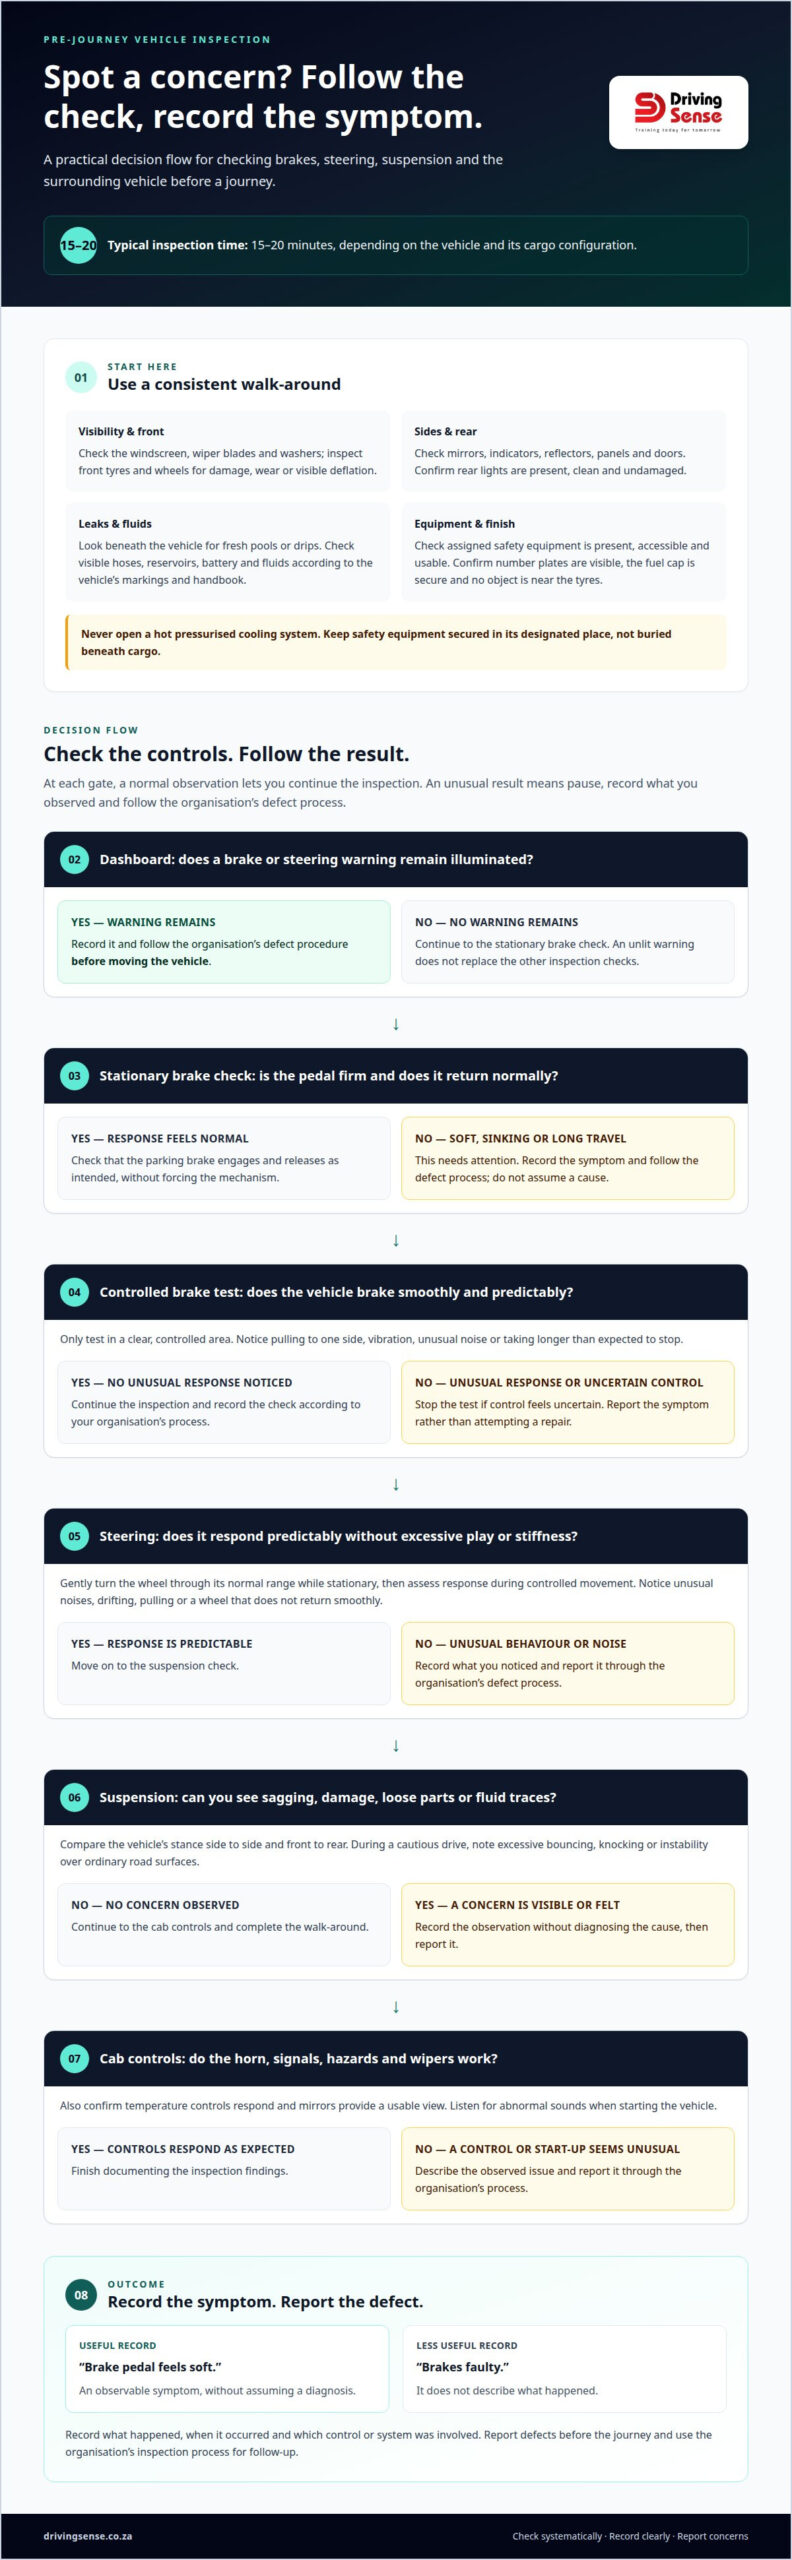
Developing a consistent walk-around inspection habit
- Use the same starting point. Begin beside the driver’s door, then follow one fixed route around the vehicle. Continue towards the front, along the passenger side, around the rear, and back to the cab. A repeated route creates a reliable sequence and makes skipped areas easier to identify.
- Follow a vehicle-specific checklist. Keep the form suited to the vehicle type and its equipment. A car, delivery van and heavy commercial vehicle may have different inspection points. Arrange the checklist in the same order as the walk-around, so drivers can match each prompt to the component in front of them.
- Inspect before distractions build. Set aside time before departure, rather than trying to inspect while managing passengers, paperwork or loading. A thorough pre-trip inspection typically takes 15-20 minutes, depending on vehicle type and cargo configuration. Where cargo changes, allow the process to account for load-related checks.
- Make the inspection conditions workable. Park in a safe, stable place and use available lighting to see the vehicle clearly. If glare, rain or dirt makes a component difficult to assess, change position or improve visibility before recording a result. Do not mark an item as satisfactory simply because it was hard to see.
- Use clear pass, defect and action fields. Record the result for each checklist item, then describe any issue in plain language. For example, note “left rear light not working” rather than entering a vague comment. A clear record helps the next person understand what needs attention and what remains outstanding.
- Keep reporting within the same workflow. Submit the completed check through the organisation’s established process, and ensure defects reach the responsible fleet contact. Avoid separate notes that can become detached from the vehicle record. When an issue is corrected, record the follow-up through the same system.
- Use digital tools where they fit the fleet. Inspection software and telematics devices can help organise records and automate parts of the process. They do not replace the driver’s visual assessment. Make sure drivers can record a visible defect, explain unusual behaviour and escalate an issue that a device may not identify.
- Build the sequence into vehicle handovers. For shared vehicles, make the inspection part of the routine before each driver sets off. Communicate unresolved defects during handover, and ensure the next driver can see the relevant record. This reduces reliance on informal messages or assumptions about what someone else checked.
- Review missed items and improve the routine. Supervisors can review completed records for blank fields, repeated defects or unclear descriptions. Use those patterns to refine checklist wording and reinforce overlooked steps. A brief review after a route or shift can turn recurring gaps into specific improvements for the next inspection.
Pre-journey checks for cars, vans and lorries
- Match the inspection to the vehicle. Use a checklist suited to the car, van or lorry being driven. A commercial vehicle may have equipment and load-related checks that a private car does not. Confirm the vehicle identity on the record before starting, particularly when drivers share vehicles or change vehicles between shifts.
- Set up the driver’s position and visibility. Adjust the seat and mirrors before departure, then check that the seatbelt fastens and releases correctly. Confirm the windscreen and windows provide a clear view. Test the horn, indicators, hazard flashers and wipers from the driver’s seat, noting any control that fails to respond.
- Assess the vehicle’s operating condition. Start the engine and observe dashboard warnings, then listen for unfamiliar sounds or difficulty starting. Check the fuel level against the planned route and inspect visible fluid levels using the vehicle’s instructions. Note warning lights or leaks on the inspection record rather than assuming they are harmless.
- Check the car’s passenger area. Confirm that seats are secure and seatbelts are accessible for each occupied position. Remove loose items that could move around the cabin during braking or cornering. Check that luggage in the boot does not obstruct the driver’s view or interfere with access to vehicle controls.
- Inspect a van’s load space and access points. Confirm the doors close securely and the load area has no obvious damage affecting its use. Check that cargo is positioned to limit movement during travel. Make sure the load does not block mirrors, lights or the driver’s view through the rear window.
- Assess lorry cargo and load distribution. Confirm the cargo is secured and positioned in accordance with the organisation’s loading procedure. Look for signs that items could shift, overhang or obscure lights and number plates. Record concerns before departure and report them through the fleet process, rather than relying on a verbal handover.
- Check temperature-sensitive goods where applicable. If the load requires temperature control, read the relevant display and compare it with the transport instructions for that cargo. Record the reading through the organisation’s process, and report a discrepancy before setting off. Keep cargo-condition checks distinct from the vehicle’s mechanical inspection.
- Review vehicle-specific equipment. Check that fitted controls, warning indicators and operating aids respond as expected. For example, where a vehicle has a reversing camera, confirm that its display activates when selected. Do not assume an item is functioning simply because no dashboard warning appears.
- Consider the journey and any changes. A loaded lorry, passenger van and private car have different operating requirements. Reassess the load after cargo has been added or rearranged, and note equipment needed for the planned work. Report any concern that could affect safe vehicle operation or the visibility of other road users.
- Complete the record before departure. Enter the vehicle details, inspection result and any defect in the organisation’s approved form. Ensure reported concerns reach the responsible person and remain visible for follow-up. To develop consistent fleet routines, take action on driver inspection training.
Driving Sense
Driving Sense provides driver training and compliance training for organisations. Driver Training can help teams build consistent vehicle-check routines, identify issues that need reporting, and understand their responsibilities before setting out. Compliance Training can support organisations in embedding clear procedures into everyday operations, including how inspection records and reported defects are managed.
Turn to Driving Sense when your organisation needs structured training to reinforce safer driving practices or strengthen compliance routines. Contact Driving Sense to discuss your driver and safety training needs.
Make safe inspections part of everyday operations
Knowing how to conduct a vehicle pre-trip inspection is a starting point. Include the practice in induction, handovers and supervision to help make it part of normal operations. Set clear expectations for who completes each check, how findings are recorded, and how unresolved defects are carried forward. Review the process when vehicles, routes or work requirements change so it stays relevant to your operations.
Driving Sense offers Driver Training, Compliance Training and Emergency Safety Training to help organisations strengthen workforce capability and reinforce consistent safety practices. If your next step is to develop driver skills or improve how inspection responsibilities are applied across your team, contact Driving Sense today.
A clear routine, supported by informed drivers and accountable reporting, gives your organisation a practical foundation for safer journeys. Take the next step with confidence.
Frequently Asked Questions
How to Conduct Effective Pre Trip Inspections?
Conduct the inspection in a fixed sequence, using a checklist suited to the vehicle. First, identify the vehicle and note existing defects or handover comments. During the check, separate what you observe from what you suspect, and record concerns clearly. For example, note a warning light that remains on rather than guessing its cause. This gives fleet management useful information for follow-up.
What Are The 5 Pre Trip Inspection Steps for Fleet Managers and Drivers?
Use five stages: identify the vehicle, complete the exterior walk-around, check the cab and controls, assess the vehicle’s operating response, then record and report findings. Fleet managers can support the process with consistent forms and clear responsibility for reviewing reported defects. Drivers should record the condition of the vehicle they will use, rather than relying on someone else’s previous inspection.
What happens if you skip a pre-trip inspection?
Skipping the check can leave a developing fault unnoticed until it disrupts a journey or contributes to an accident. A faulty light, for instance, may affect visibility to other road users, while a fluid leak may signal a problem that needs attention. An inspection cannot prevent every fault, but it gives drivers the chance to identify and report visible concerns before departure.
When Should This Process Be Conducted?
Inspect the vehicle before each journey, even if it has already been driven that day. Repeat relevant checks if the vehicle changes, cargo is added or rearranged, or a new warning appears during a handover. For example, a driver taking over a van should assess its current condition rather than assume the previous shift’s record covers any changes since then.
What are the steps for conducting a vehicle pre-trip inspection?
Start by confirming the vehicle’s identity and choosing the applicable checklist. Inspect the exterior, then check the driver’s area, safety equipment and controls. Start the vehicle and look for warning indicators or unusual behaviour. Consider the load and its securement where applicable. Finish by recording the results and reporting defects through your organisation’s procedure. This sequence links observations to clear follow-up actions.
How do you check tyres, brakes, lights and indicators before a trip?
Check each tyre for visible damage, embedded objects, bulges or uneven wear, and inspect accessible wheels for damage. With the vehicle powered, test the indicators and other lights to confirm they work. While stationary, assess the brake pedal’s feel; then check braking at low speed in a clear, controlled area. Document and report pulling, unusual noise or an unexpected response.
How do you inspect engine oil, coolant, brake fluid and other vehicle fluids?
Park on level ground and follow the vehicle handbook when checking reservoirs or dipsticks, as procedures vary by model. Use the marked ranges to assess engine oil, coolant and brake fluid, and look for fresh fluid beneath the vehicle. Check washer fluid too. Never open a pressurised cooling system while it is hot. Report a low level or leak rather than guessing its cause.
How do you check a vehicle’s windscreen, mirrors, wipers and seat belts?
From the driver’s seat, check the windscreen for cracks, dirt or objects that obstruct your view. Adjust each mirror and confirm the glass and mounting provide a clear rearward view. Operate the wipers and washer system to check that they respond. For each occupied seat, pull the belt across the body, insert the buckle, and confirm it fastens and releases correctly.
